The CC3000 comes with an interesting way on how to passing the information of WLAN network (SSID and password) to the CC3000 embedded WiFi device to which it shall connect to. This technology is called the SmartConfig. It basically uses another host (could be smart phones or PCs) to send out some packets to the air which are neglected by any other devices on the network (since the packets look meaningless to the other device,will show it later), but can be interpreted by the CC3000. In this guide, I will show how a step-by-step guide on how to work with SmartConfig technology using the Basic WiFi Host from my previous post and also the SmartConfig Java Applet from TI.
System Setup
This guide is using similar same setup which I am using in my previous post about the CC3000 Basic WiFi Host as illustrated below:
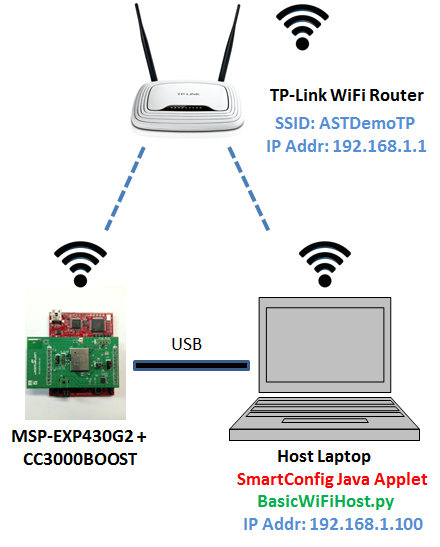
Target device is MSP-EXP430G2 Launchpad+CC3000BOOST running BasicWiFi Host. The Host PC/Laptop side I am running the SmartConfig Java Applet and the Basic WiFi Host python script v0.1.0.
So the first step of all before running the Java Applet is to connect the Host PC/laptop where the Java Applet runs to the same WLAN network which the CC3000 shall also connect to later. As shown above, in my test system the TP-Link WLAN router has the IP Address 192.168.1.1 and the Host PC/Laptop gets IP Address of 192.168.1.100.
Running SmartConfig Java Applet
The SmartConfig Java Applet can be downloaded from this link, or even run directly on TI website from this link.
Before running the Java Applet, there is a very important step before opening the web page containing the Java Applet which is basically to make sure that the MTU (Maximum Transmission Unit) to be at least 1500 bytes as described in this wiki. You can basically check this by trying to run the SmartConfig Java Applet from this link, and see whether you are seeing this kind of warning message windows:
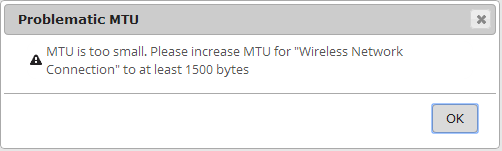
this means you need to execute the command in the command line interface as described in this wiki.
As described in the wiki, basically you need to execute a command in the command line interface depending on the Operating System (OS) of your PC/laptop which might need administrator right to execute. For example I am using Windows 7, so:
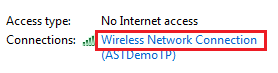
- Check the network interface name assigned to the PC WLAN adapter by going to “Control Panel” -> “Network and Sharing Center”, and I found that the name of my WLAN adapter is assgined as “Wireless Network Connection”.
- To make it easier, I create a batch file by opening notepad, write down the following lines in the text file:
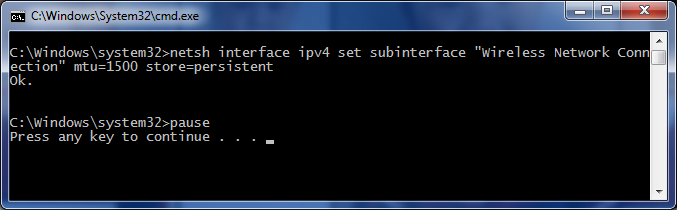
netsh interface ipv4 set subinterface "Wireless Network Connection" mtu=1500 store=persistent
pause
"C:\Program Files (x86)\Google\Chrome\Application\chrome.exe" "C:\ti\CC3000\SmartConfigJavaApplet-1.1\Website\smartConfig.html"
and save it e.g. as “smartconfig_java_applet.bat” on my desktop. Then I can simply do a right-click on the file on my desktop, and select “Run as administrator”.
Besides executing the command to set the MTU size, I also add the line to automatically open the HTML file of the SmartConfig Java Applet using Google Chrome web browser from the command line. It might be necessary to modify the path of the web browser executable file and also the path to the SmartConfig Java Applet HTML file depending on installation.
Between the two lines, I added “pause” command to see the result of the command for setting MTU size, since it shall print out the output “Ok.” as follows:
After the HTML file is opened with the web browser, you need to wait Just as the iOS and Android apps, the SmartConfig Java Applet has the following input text fields as described also on this link:
- SSID: the SSID name of the WLAN network to which the CC3000 shall connect – this field will be automatically filled in, e.g. in my case with “ASTDemoTP”
- Password: the security password of the WLAN network to which the CC3000 shall connect.
- Gateway IP Address: this field will be IP address of the WLAN router – this field will be automatically filled in, e.g. in my case with “192.168.1.1”
- Key: AES key which is used to decode the SmartConfig packets
- Device Name: shall corresponds to the char device_name[] in basic_wifi_application.c file of the running firmware on the MSP-EXP430G2 Launchpad which is used for mDNS advertising.
When starting the SmartConfig Java Applet by pressing “START” button, you can see e.g. using Wireshark that the PCstarts to send some UDP packets to the WLAN router with meaningless data like follows:

NOTE: If you can’t see the UDP packets sent out from your PC/laptop, try to disable the Firewall on your PC/laptop. I noticed that when the Firewall is activated, wireshark won’t show any outgoing packets.
If you wonder what is the meaning of these packets with regard to the information regarding the WLAN network SSID, etc., it is basically the length of the packets instead of the content which contains the SmartConfig information. I found a very nice and detailed description regarding this technique which is described in this link.
After making sure that the host PC can send the SmartConfig UDP packets, you can stopthe transmission for now since we are going to continue by setting up the Launchpad and CC3000BOOST.
Testing SmartConfig with CC3000BOOST
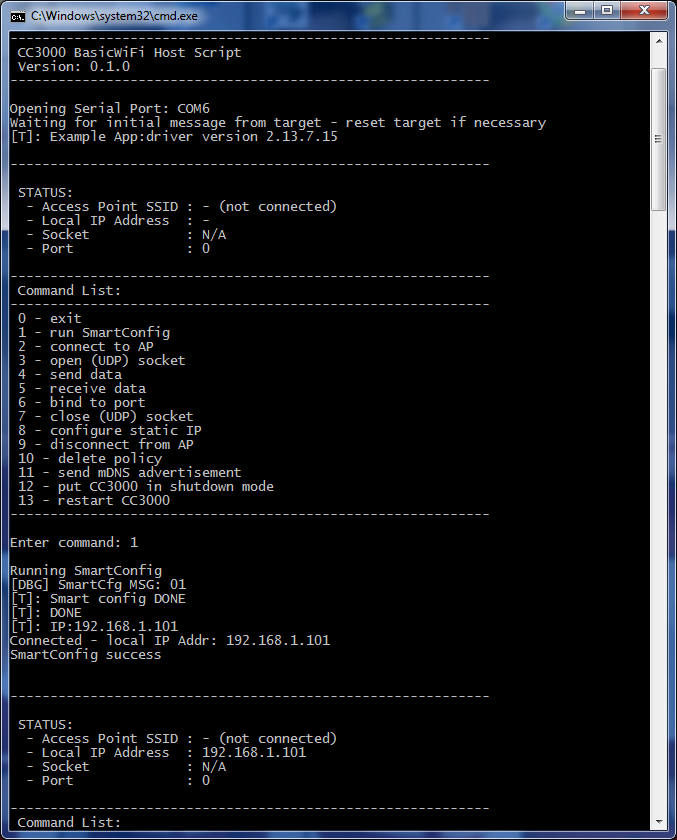
As I mentioned before, I am using the Basic WiFi example firmware for Launchpad and also the Basic WiFi Host. After flashing the MSP-EXP430G2 Launchpad with the Basic WiFi example firmware, I run the Basic WiFi host in console mode (command line parameter -c), and then execute the “run SmartConfig” command (1). Then start the SmartConfig transmission again with the Java Applet.
After waiting around 5-10seconds, the Launchpad shall reply with some messages notifying that the SmartConfig succeds which means that the CC3000 has successfully connected to the WLAN network and also receives an IP address. This is shown as follows:
One thing to be noticed after executing the SmartConfig is that the WLAN configuration is stored in the CC3000 non volatile memory and next time it startsup, the CC3000 will directly try to connect to the same WLAN network as before. To erase this configuration, use the “delete policy” (10) command from the Basic WiFi host command line.